How to Care for Wood Furniture Handles: Cleaning, Conditioning, and Maintenance Tips
1. Introduction: Why Wood Handles Deserve Special Care
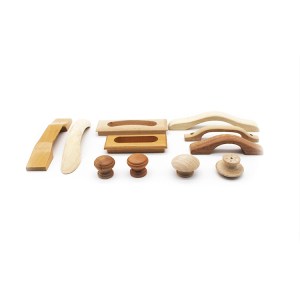
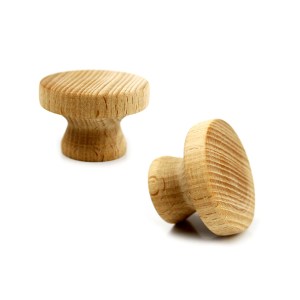
Wooden furniture handles, like Natural Colorful Wooden Handles, add warmth to furniture but require unique care. Unlike stainless steel or ABS plastic, wood absorbs oils, swells in humidity, and cracks when dry. For example, unsealed oak handles in kitchens can warp within months if exposed to steam.
Key Expectations:
- Learn daily cleaning habits.
- Avoid irreversible damage.
- Extend handle lifespan by 5+ years.
2. Common Issues with Wood Furniture Handles
| Problem | Cause | Example |
|---|---|---|
| Fading | UV exposure | Sunlit cabinets near windows |
| Cracking | Low humidity | Winter heating systems |
| Swelling | Moisture buildup | Bathroom vanity handles |
Long-Term Damage:
- Oils from hands darken unsealed wood.
- Steam loosens glue in laminated handles.
3. Daily Cleaning Tips for Wood Handles
Step-by-Step Guide with Detailed Actions
- Dry Dusting
- Tools: Microfiber cloth (lint-free) or soft-bristled brush.
- Action:
- Wipe handles along the wood grain to avoid scratching.
- For carved handles (e.g., Eco-Friendly Wooden Knobs), use a brush to reach crevices.
- Why: Removes dust and skin oils that dull the finish.
- Spot Cleaning for Stains
- Tools: Spray bottle with 1 tsp pH-neutral soap + 2 cups water.
- Action:
- Lightly mist the cloth—never spray directly on wood.
- Wipe stains gently, then immediately dry with a separate cloth.
- Example: Coffee splatters on kitchen cabinet handles? Dab, don't scrub.
- Drying
- Tools: Absorbent cloth (e.g., cotton tea towel).
- Action:
- Press cloth against the handle to soak up moisture.
- Leave drawers/cabinets open for 10 minutes to air-dry fully.
- Quick Conditioning (Optional)
- Products: Beeswax balm or olive oil (for unsealed wood).
- Action:
- Apply a pea-sized amount to a cloth.
- Rub in circular motions, then buff with a dry cloth.
- Frequency: Once a month for high-touch handles.
4. Deep Cleaning for Tough Stains or Build-up
Stain Removal Guide with Step-by-Step Actions
1. Grease/Oil Stains
Tools:
- Soft-bristle toothbrush
- Baking soda + water paste (3:1 ratio)
- Microfiber cloth
Steps:
- Apply Paste: Spread a thin layer over the stain.
- Scrub Gently: Use the toothbrush along the wood grain for 1–2 minutes.
- Rinse: Dampen cloth with water, wipe residue.
- Dry Immediately: Blot with dry cloth, then air-dry.
⚠️ Avoid: Scrubbing cross-grain—it lifts wood fibers.
2. Ink Stains
Tools:
- Cotton swab
- Rubbing alcohol (70% isopropyl)
- Wood conditioner (e.g., beeswax)
Steps:
- Test First: Dab alcohol on a hidden area to check finish durability.
- Spot Treat: Dip swab in alcohol, press (don't rub) on the stain.
- Blot: Use dry cloth to absorb lifted ink.
- Condition: Apply wax to restore moisture.
💡 Note: Only works on sealed finishes—unsealed wood will absorb alcohol and warp.
3. Mold/Mildew
Tools:
- Hydrogen peroxide (3%)
- Spray bottle
- Soft cloth
Steps:
- Mix Solution: 1 part peroxide + 3 parts water.
- Spray & Wait: Lightly mist the area, let sit 5 minutes.
- Wipe: Use cloth to remove mold.
- Dry Thoroughly: Place near a fan for 1 hour.
⚠️ Warning: Never use bleach—it yellows wood.
4. Water Rings/White Stains
Tools:
- Mayonnaise or toothpaste (non-gel)
- Soft cloth
Steps:
- Apply: Spread a thin layer over the stain.
- Let Sit: 15–20 minutes.
- Buff: Wipe off with cloth, using circular motions.
- Polish: Apply linseed oil to protect the area.
💡 Why It Works: Fats in mayo penetrate and lift moisture trapped in the finish.
⚠️ Note: This method works best on sealed wood surfaces. For unfinished or raw wood, water stains may have penetrated too deeply and may require sanding and refinishing. Always use a microfiber cloth to avoid scratching the surface during buffing.
5. Adhesive Residue (Stickers/Tape)
Tools:
- Hairdryer
- Olive oil or WD-40
- Plastic scraper (not metal!)
Steps:
- Heat: Blow warm air on the residue for 30 seconds.
- Lift Edge: Gently scrape with plastic tool.
- Oil Treatment: Rub olive oil on leftover glue, wait 10 minutes, then wipe.
- Clean: Use soapy water to remove oil, dry immediately.
💡 Tip: Olive oil is gentle and works well on unfinished or lightly finished wood, but it can leave shadows on high-gloss or lacquered surfaces if not cleaned properly.
⚠️ Caution: WD-40 contains solvents and should only be used on sealed or varnished finishes. Always spot-test in an inconspicuous area before full application.
6. Post-Cleaning Care
- Always reapply wax/oil after deep cleaning.
- For kitchens, pair wood handles with zinc alloy pulls near sinks to minimize future stains.
7. Tools Checklist
5. Seasonal Maintenance & Conditioning
Spring/Fall Routine:
- Clean handles with mild soap.
- Apply beeswax or linseed oil in circular motions.
- Buff with dry cloth after 15 minutes.
Product Comparison:
| Product | Best For | Frequency |
|---|---|---|
| Beeswax | Sealed finishes | Every 6 months |
| Tung Oil | Unsealed wood | Every 3 months |
6. What to Avoid When Caring for Wood Handles
Wood handles need gentle care—mistakes can cause irreversible damage. Here's a breakdown of common pitfalls, why they're harmful, and how to fix/prevent them:
1. Using Harsh Cleaners
What Happens:
- Alcohol-based sprays: Strip protective wax, leaving wood porous.
- Ammonia/bleach: Fade finishes and weaken glue in laminated handles.
- Example: A client ruined her vintage dresser handles by using glass cleaner—the wood turned gray and splintered.
Fix:
- Stick to pH-neutral soap (e.g., Castile) or vinegar-water mixes.
- For disinfecting, use diluted hydrogen peroxide (1:3 with water).
Alternative: Pair wood with stainless steel handles in high-spill areas like kitchens.
2. Soaking Handles in Water
What Happens:
- Wood absorbs water, swells, and warps (e.g., bathroom vanity handles).
- Prolonged moisture breeds mold in crevices.
Fix:
- Wipe spills immediately with a barely damp cloth.
- For deep cleaning, dry handles within 5 minutes using a fan.
Pro Tip: In humid spaces, use zinc alloy handles—they mimic wood's look but resist swelling.
3. Ignoring Loose Screws
What Happens:
- Wobbly handles strain the screw holes, widening cracks.
- Over time, stripped holes force replacement.
Fix:
- Tighten screws gently—don't overtighten (compresses wood fibers).
- For stripped holes:
- Fill hole with toothpick bits + wood glue.
- Let dry 24 hours.
- Re-drill and screw.
Upgrade: Use brass screws—they're softer than steel and less likely to split wood.
4. Skipping Seasonal Conditioning
What Happens:
- Dry air (winter) → cracks.
- Humidity (summer) → warping.
Fix:
- Spring/Fall: Apply beeswax or linseed oil.
- Winter: Run a humidifier (keep RH 40–60%).
- Summer: Use dehumidifier near cabinets.
Conditioner Pick: Howard Feed-N-Wax for quick absorption.
5. Placing Handles Near Heat Sources
What Happens:
- Radiators, ovens, or direct sunlight dry out wood, causing splits.
- Example: A kitchen handle 12 inches from a stove cracked within 6 months.
Fix:
- Relocate heat-sensitive furniture.
- Use heat-resistant alternatives like aluminum handles near stoves.
6. Over-Polishing with Oils
What Happens:
- Excess oil (e.g., olive oil) attracts dust and turns rancid.
- Creates sticky buildup in carvings.
Fix:
- Apply oil sparingly—1 tsp covers 4–5 handles.
- Buff off residue with a dry cloth.
Better Option: Use polymerized tung oil—it dries hard and doesn't go rancid.
7. Using Abrasive Tools
What Happens:
- Steel wool/scouring pads scratch finishes.
- Rough brushes lift wood grain in detailed carvings.
Fix:
- Use microfiber cloths or soft nylon brushes.
- For stubborn grime, try a melamine sponge (gently).
7. Best Products for Wooden Handle Care
Recommended Brands:
- Howard Feed-N-Wax: Restores shine without residue.
- Furniture Clinic Beeswax: Food-safe for kitchens.
- DIY Mix: 1 part olive oil + 1 part white vinegar (natural polish).
Eco-Friendly Alternative: Pair wood with recycled brass handles for lower maintenance.
8. When to Replace or Refinish Wooden Handles
Repairable Issues
Light Scratches:
- Rub with a walnut or tea-stained cloth to mask marks.
- Apply beeswax to blend and protect.
Loose Screws:
- Fill stripped holes with toothpick pieces + wood glue.
- Re-drill gently and tighten.
Faded Finish:
- Sand lightly with 220-grit paper.
- Restain or apply wood conditioner.
Time to Replace
Deep Cracks/Splits:
- Cracks wider than 1/8 inch trap moisture and spread.
- Example: Handles near sinks often split due to repeated swelling.
Rot or Mold Damage:
- Soft, crumbly wood indicates internal decay.
- Replace immediately to prevent spreading to furniture.
Severe Warping:
- Handles that no longer sit flat or align with hardware.
- Common in bathrooms with poor ventilation.
Upgrade Option: Swap damaged handles with zinc alloy knobs for water resistance.
Refinishing Basics
- For Minor Wear:
- Clean → Sand → Stain → Seal with wax.
- For Paint:
- Use chalk paint + polyurethane topcoat for durability.
Tip: Match new finishes to furniture legs or trim for consistency.
When DIY Isn't Enough
- Custom Replacement: Brands like Custom Brass Handles offer sizes/styles to match originals.
- Mixed Materials: Pair wood with stainless steel pulls on the same piece for contrast.
Quick Decision Guide
| Issue | Action |
|---|---|
| Surface scratches | Refinish |
| Loose screws | Repair |
| Mold/rot | Replace |
| Warping | Replace |
FAQs
Q: Can I use coconut oil on wood handles?
A: Yes, but mix with beeswax to prevent rancidity.
Q: How to fix sticky residue from polish?
A: Wipe with mineral spirits, then reapply wax.
Q: Are wood handles safe for kitchens?
A: Only if sealed with food-grade wax. For heavy use, pair with stainless steel.


